CMA:数据分析 Agent
CSV → 交互式 HTML 报告自动生成
🌐 查看英文原文 | 源码 Notebook
使用 Claude Managed Agents 构建数据分析 Agent
简介
每个团队都有人被递给一个 CSV 并被问”这里面有什么有趣的?” 在本 cookbook 中,你将构建一个替他们回答的 Agent:上传一个 CSV,获得一份带有交互式图表的叙述性 HTML 报告。
你将在 Claude Managed Agents 上运行它,这是 Anthropic 用于有状态、使用工具的 Agent 的托管运行时,基于四个核心概念:
- Agent:模型、系统提示、工具、MCP 服务器和技能
- Environment:配置好的容器模板(包、网络访问)
- Session:environment 中的运行中 agent 实例,执行特定任务并生成输出
- Events:你的应用程序和 Agent 之间交换的消息(用户轮次、工具结果、状态更新)
一个 agent 加一个 environment 给你一个 session。你将数据作为 resources 附加到它,然后通过发送事件和读回流来驱动它。
Anthropic 为你处理沙盒、工具执行和上下文管理。如果你需要完全控制 Agent 循环和部署,请尝试 Claude Agent SDK。
你将学到什么
通过本 cookbook,你将能够:
- 设置可复用的数据分析和 agent 的 environment
- 将数据集交给 Agent 处理
- 在 Agent 运行时观察其进度
- 下载报告和它生成的任何其他文件
前提条件
- Python 3.11+
- 来自 Console 的 Anthropic API 密钥,设置为
ANTHROPIC_API_KEY
安装依赖:
%%capture
%pip install -q "anthropic>=0.91.0" python-dotenv
from pathlib import Path
from anthropic import Anthropic
from dotenv import load_dotenv, set_key
load_dotenv()
client = Anthropic()
MODEL = "claude-sonnet-4-6"1. 创建 environment
Environment 是一个可复用的容器规范。在这里声明 pandas 和 plotly 意味着每个 session 都以预安装它们开始,因此 Agent 可以立即开始分析,而不是先运行 pip install。
这里的网络是 unrestricted,以便 Agent 可以从 CDN 加载 plotly——但这让它可以到达互联网上的任何地方,因此在生产环境中请使用 host 白名单。
env = client.beta.environments.create(
    name="cookbook-data-analyst-env",
    config={
        "type": "cloud",
        "networking": {"type": "unrestricted"},
        "packages": {
            "type": "packages",
            "pip": ["pandas", "plotly"],
        },
    },
)
2. 创建 agent
Agent 将模型与系统提示和一组工具配对。大部分输出质量来自系统提示;这个系统提示推动叙述结构、有具体数据支持的发现,以及在单个 HTML 文件中嵌入多个 plotly 图表的正确模式。
agent_toolset_20260401 提供八个工具:bash、read、write、edit、glob、grep、web_fetch 和 web_search。这里它们都在 always_allow 下运行,两个 Web 工具被禁用,因为此分析是离线的。
ANALYST_SYSTEM_PROMPT = """\
You are a senior data analyst producing a publication-quality report.

## Style
- Professional and precise. Let the data speak with concrete numbers.
- Short paragraphs (2-3 sentences) between charts.
- Lead with the most actionable finding.

## Execution
- Write .py scripts and run them with `python3 script.py`.
- Sample large tables (`nrows=` / `.sample()`) instead of loading everything.
- Sanity-check key metrics before building narrative around them.

## Charts
- Build each chart as its own `go.Figure()`, embed with
  `fig.to_html(include_plotlyjs=False, full_html=False)`, and load plotly
  from the CDN once in <head>.
- Always set `marker_color` and `template='simple_white'`.

## Output
Write a single self-contained `report.html` to /mnt/session/outputs/
with inline CSS, 3+ embedded plotly charts, and a closing section of
actionable recommendations. Confirm "Saved: report.html" when done.
"""

agent = client.beta.agents.create(
    name="cookbook-data-analyst",
    model=MODEL,
    system=ANALYST_SYSTEM_PROMPT,
    tools=[
        {
            "type": "agent_toolset_20260401",
            # default_config applies to every tool in the set;
            # entries in configs override specific tools.
            "default_config": {
                "enabled": True,
                "permission_policy": {"type": "always_allow"},
            },
            "configs": [
                {"name": "web_search", "enabled": False},
                {"name": "web_fetch", "enabled": False},
            ],
        }
    ],
)
3. 上传数据集
包含的示例 CSV 有 50 行,因此分析在几分钟内完成。在这里替换任何 CSV(或 CSV 的 zip);其余流程相同。
DATA_PATH = Path("example_data/data_analyst_agent/sales_data.csv")

with DATA_PATH.open("rb") as f:
    dataset = client.beta.files.upload(file=(DATA_PATH.name, f, "text/csv"))

print(f"Uploaded {DATA_PATH.name} ({dataset.size_bytes} bytes) as {dataset.id}")
Uploaded sales_data.csv (2833 bytes) as file_011CZqKKomgL45BLo2J8K5X94. 创建 session 并发送任务
Session 将 agent 绑定到 environment 和任何挂载的文件。传递 {"type": "agent", "id": ..., "version": ...} 复用你上面创建的带版本的 agent。resources 将上传的文件挂载到容器内给定的绝对路径。
创建 session 后,发送一个带有任务的 user.message 事件。Agent 将立即开始工作。
MOUNT_PATH = f"/mnt/session/uploads/{DATA_PATH.name}"

session = client.beta.sessions.create(
    environment_id=env.id,
    agent={"type": "agent", "id": agent.id, "version": agent.version},
    resources=[{"type": "file", "file_id": dataset.id, "mount_path": MOUNT_PATH}],
    title="Sales analysis",
)

ANALYSIS_PROMPT = f"""\
Analyze the e-commerce orders in {MOUNT_PATH}.

Columns: order_id, customer_id, product, category, price, quantity,
order_date, region.

Focus on revenue by category and region, repeat-customer behavior, and
one surprising pattern. Produce report.html per your system instructions.
"""

client.beta.sessions.events.send(
    session.id,
    events=[
        {"type": "user.message", "content": [{"type": "text", "text": ANALYSIS_PROMPT}]},
    ],
)
print(f"Session {session.id} running")
Session sesn_011CZqKKqyPRph9J5khKLn6u running5. 流式传输运行
在 Console 的 Sessions 下打开 session 以实时观看每个事件、工具调用和 token 计数:
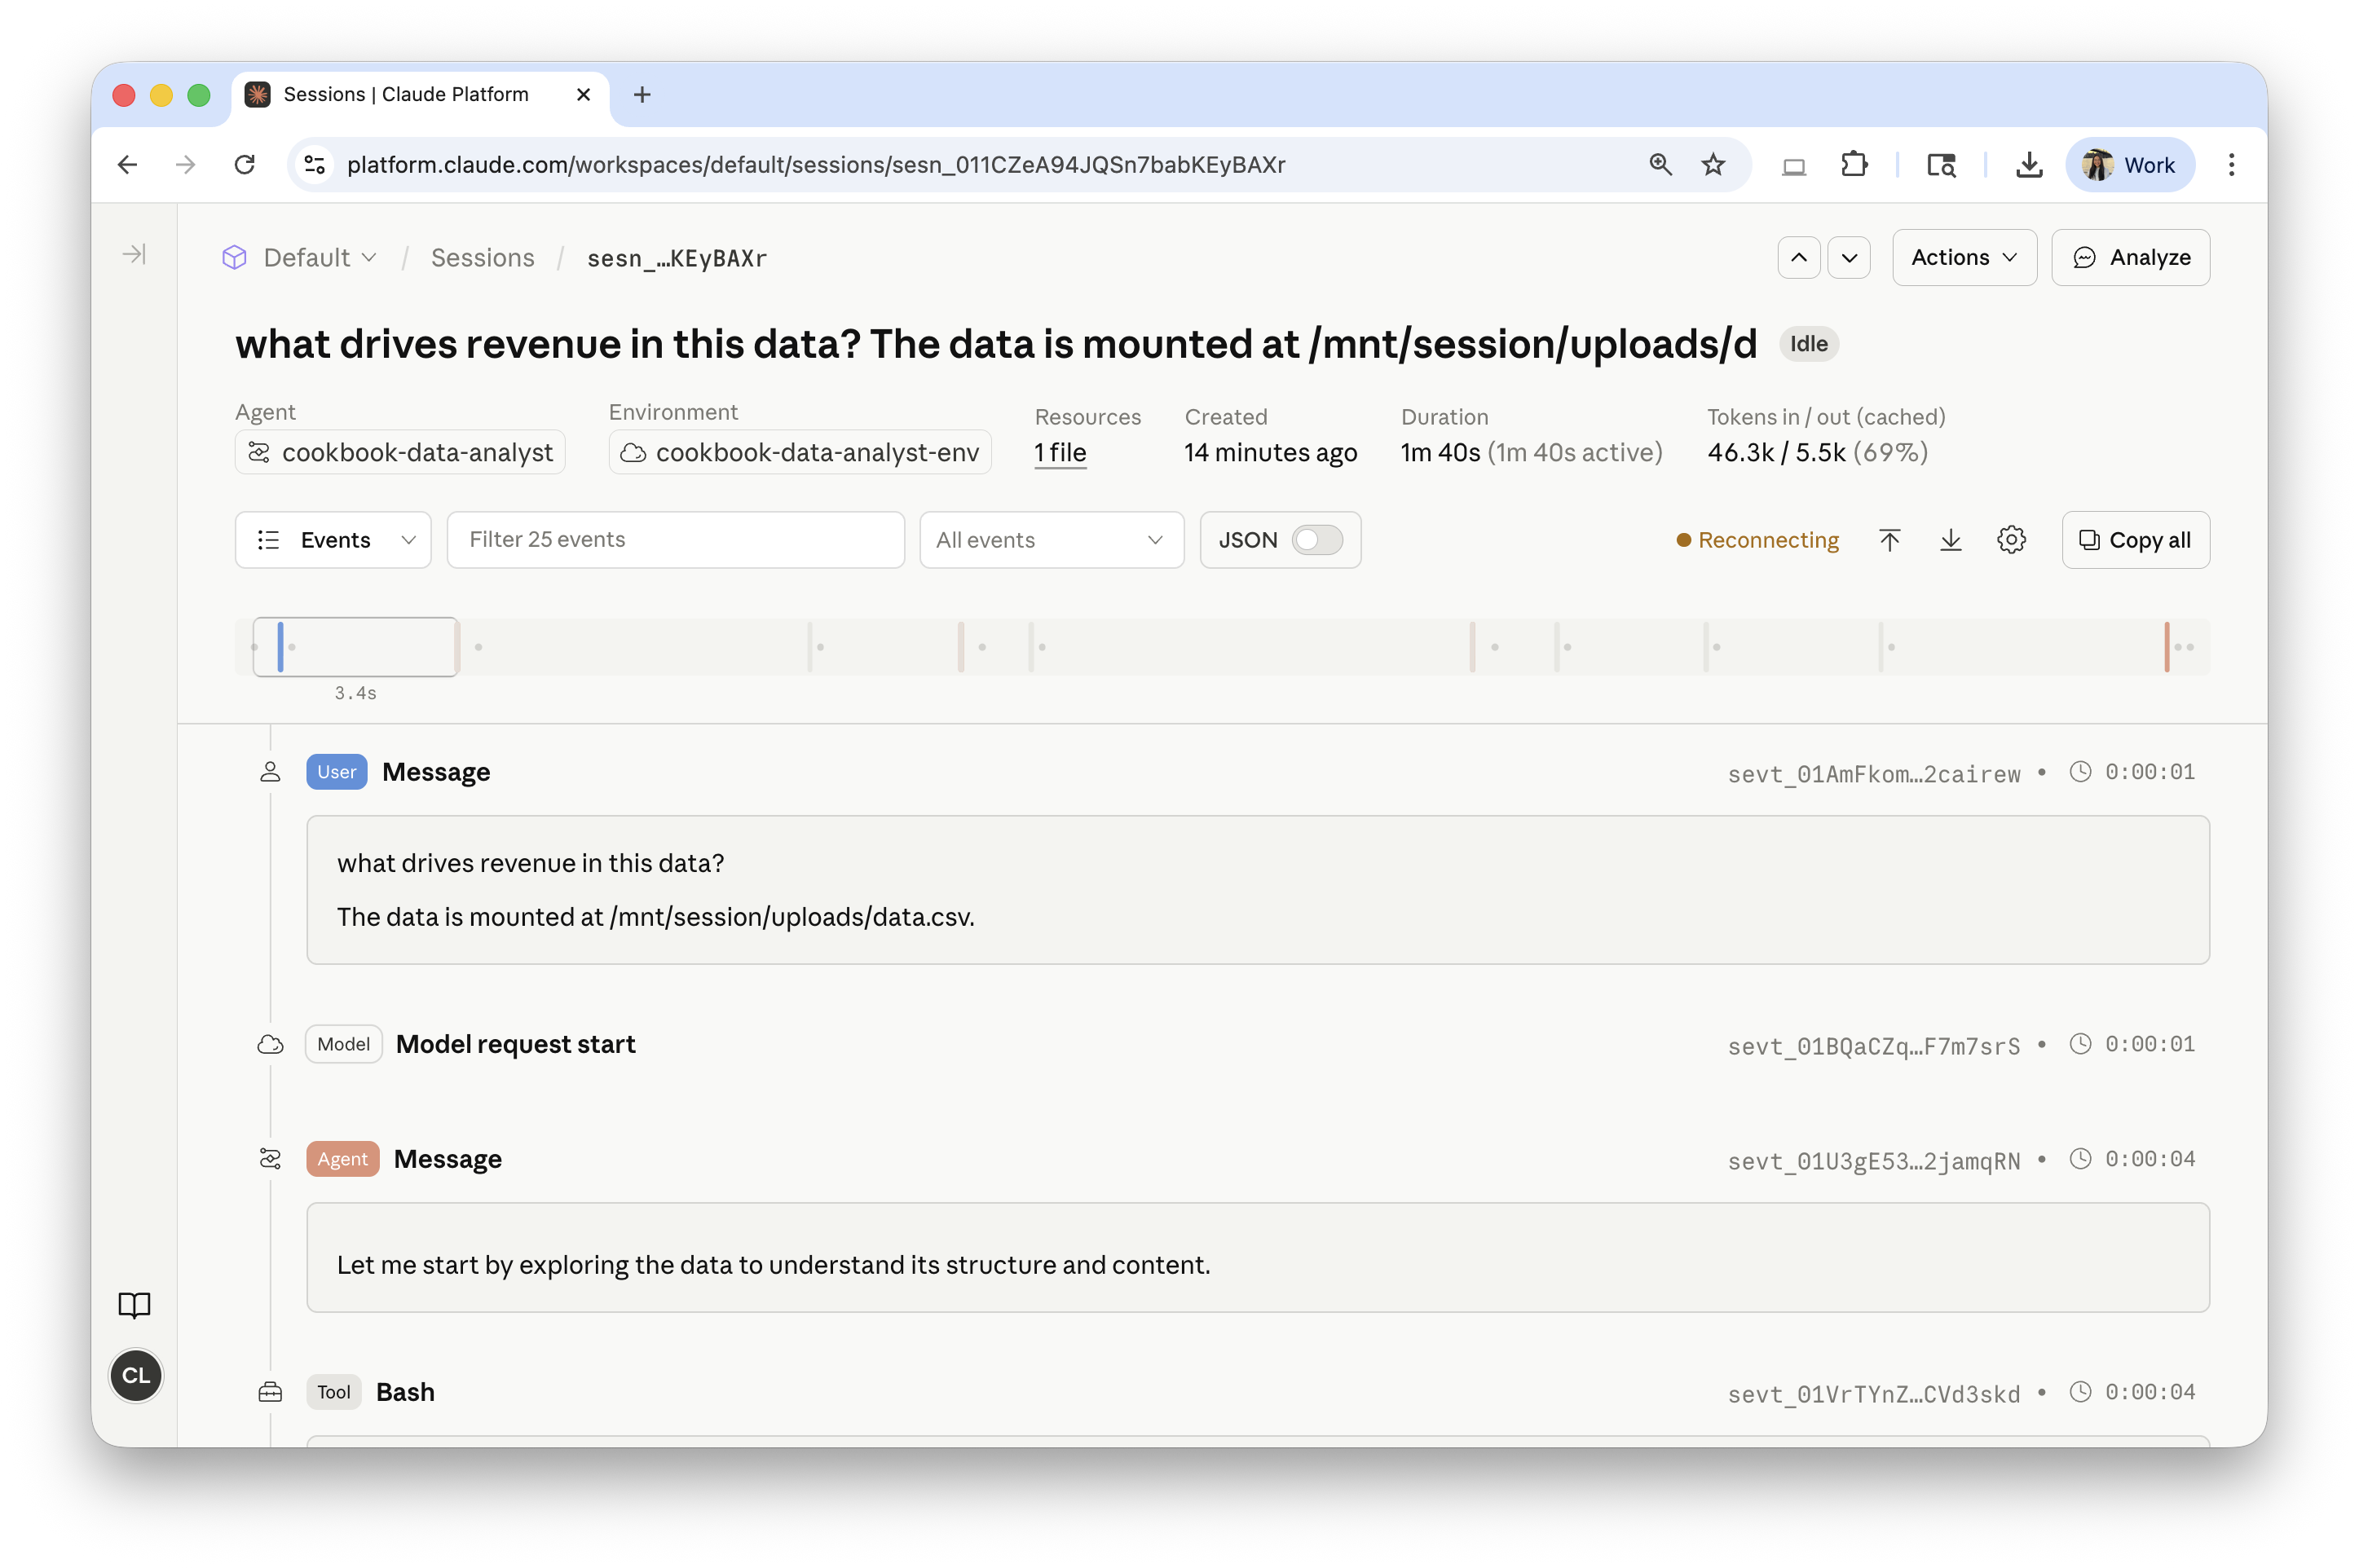
下面的辅助函数跟踪相同的事件流,在到达时打印 agent.message 文本和 agent.tool_use 调用,并在 session.status_idle 时返回。
def wait_for_idle(session_id: str) -> None:
    for ev in client.beta.sessions.events.stream(session_id):
        t = ev.type
        if t == "agent.message":
            for block in ev.content:
                if block.type == "text":
                    text = block.text
                    print(text[:300] + ("..." if len(text) > 300 else ""))
        elif t in ("agent.tool_use", "agent.mcp_tool_use"):
            print(f"  [{ev.name}]")
        elif t == "session.status_idle":
            return
        elif t == "session.status_terminated":
            raise RuntimeError(
                "Session terminated before going idle. "
                f"Trace: https://platform.claude.com/sessions/{session_id}"
            )


wait_for_idle(session.id)
6. 检索报告
Agent 写入 /mnt/session/outputs/ 的任何内容都会被持久化并通过 Files API 以 scope_id=<session_id> 呈现。在容器其他地方写入的文件不会被持久化。
Files API 是一个独立的 beta 功能,因此要在此处使用 scope_id,你还需要传递 Managed Agents beta header。
outputs = client.beta.files.list(scope_id=session.id, betas=["managed-agents-2026-04-01"])
for f in outputs.data:
    print(f.filename, f.size_bytes)

# The list also includes the mounted input CSV; pick out the report.
report = next((f for f in outputs.data if f.filename == "report.html"), None)
if report is None:
    raise RuntimeError(f"report.html not found. Files: {[f.filename for f in outputs.data]}")
content = client.beta.files.download(report.id)
Path("report.html").write_bytes(content.read())
print("Downloaded report.html")
report.html 53728
sales_data.csv 2833
Downloaded report.html7. 清理和后续步骤
你创建一次 agent 和 environment 并在运行之间复用它们;你为每个对话创建一个新的 session。既然你有了报告,请归档此 session 以释放其容器。下面的行将 agent 和 environment ID 保存到 .env,以便 slack_data_bot.ipynb 可以用它们启动新的 session。
警告: 在运行下一个单元格之前,确保
.env列在.gitignore中——永远不要提交它。
client.beta.sessions.archive(session.id)

set_key(".env", "ANALYST_ENV_ID", env.id)
set_key(".env", "ANALYST_AGENT_ID", agent.id)
set_key(".env", "ANALYST_AGENT_VERSION", str(agent.version))
print("Saved ANALYST_ENV_ID, ANALYST_AGENT_ID, ANALYST_AGENT_VERSION to .env")
Saved ANALYST_ENV_ID, ANALYST_AGENT_ID, ANALYST_AGENT_VERSION to .env你已经端到端构建并运行了数据分析 Agent:可复用的 environment 和 agent、挂载了你的 CSV 的 session、实时事件流和下载的 HTML 报告。
从这里开始:
- 打开下载的
report.html查看叙述和图表。 - 在 Console 中打开 session 检查 token 使用量和完整的事件日志。
- 继续到
slack_data_bot.ipynb从 Slack 驱动此 Agent。
中文读者提示:本章节的代码和输出为英文原文。如需理解具体实现细节,可参考上方中文导读和代码注释。如有疑问,欢迎在 GitHub Issues 讨论。